I first made a pair of these pants before I was even pregnant with Linde. I’ve since made many more. I frequently adjust the measurements, and now have little miss outfitted through 12 months! There really is a lack of creativity in baby clothes out there, and I love the idea of my babe being uniquely dressed. I’m also eternally irritated that all boy clothes are blue, and all girl clothes are pink. Why do we feel it so necessary to pidgin hole our kids this way? And, is it really important that every stranger they come across knows their gender at first glance? Why are parents concerned that their daughter might be mistaken for a boy, and vise versa? Well, I digress. Here’s the instructions for the pants. I hope I made it easy to understand, but email me with any questions.
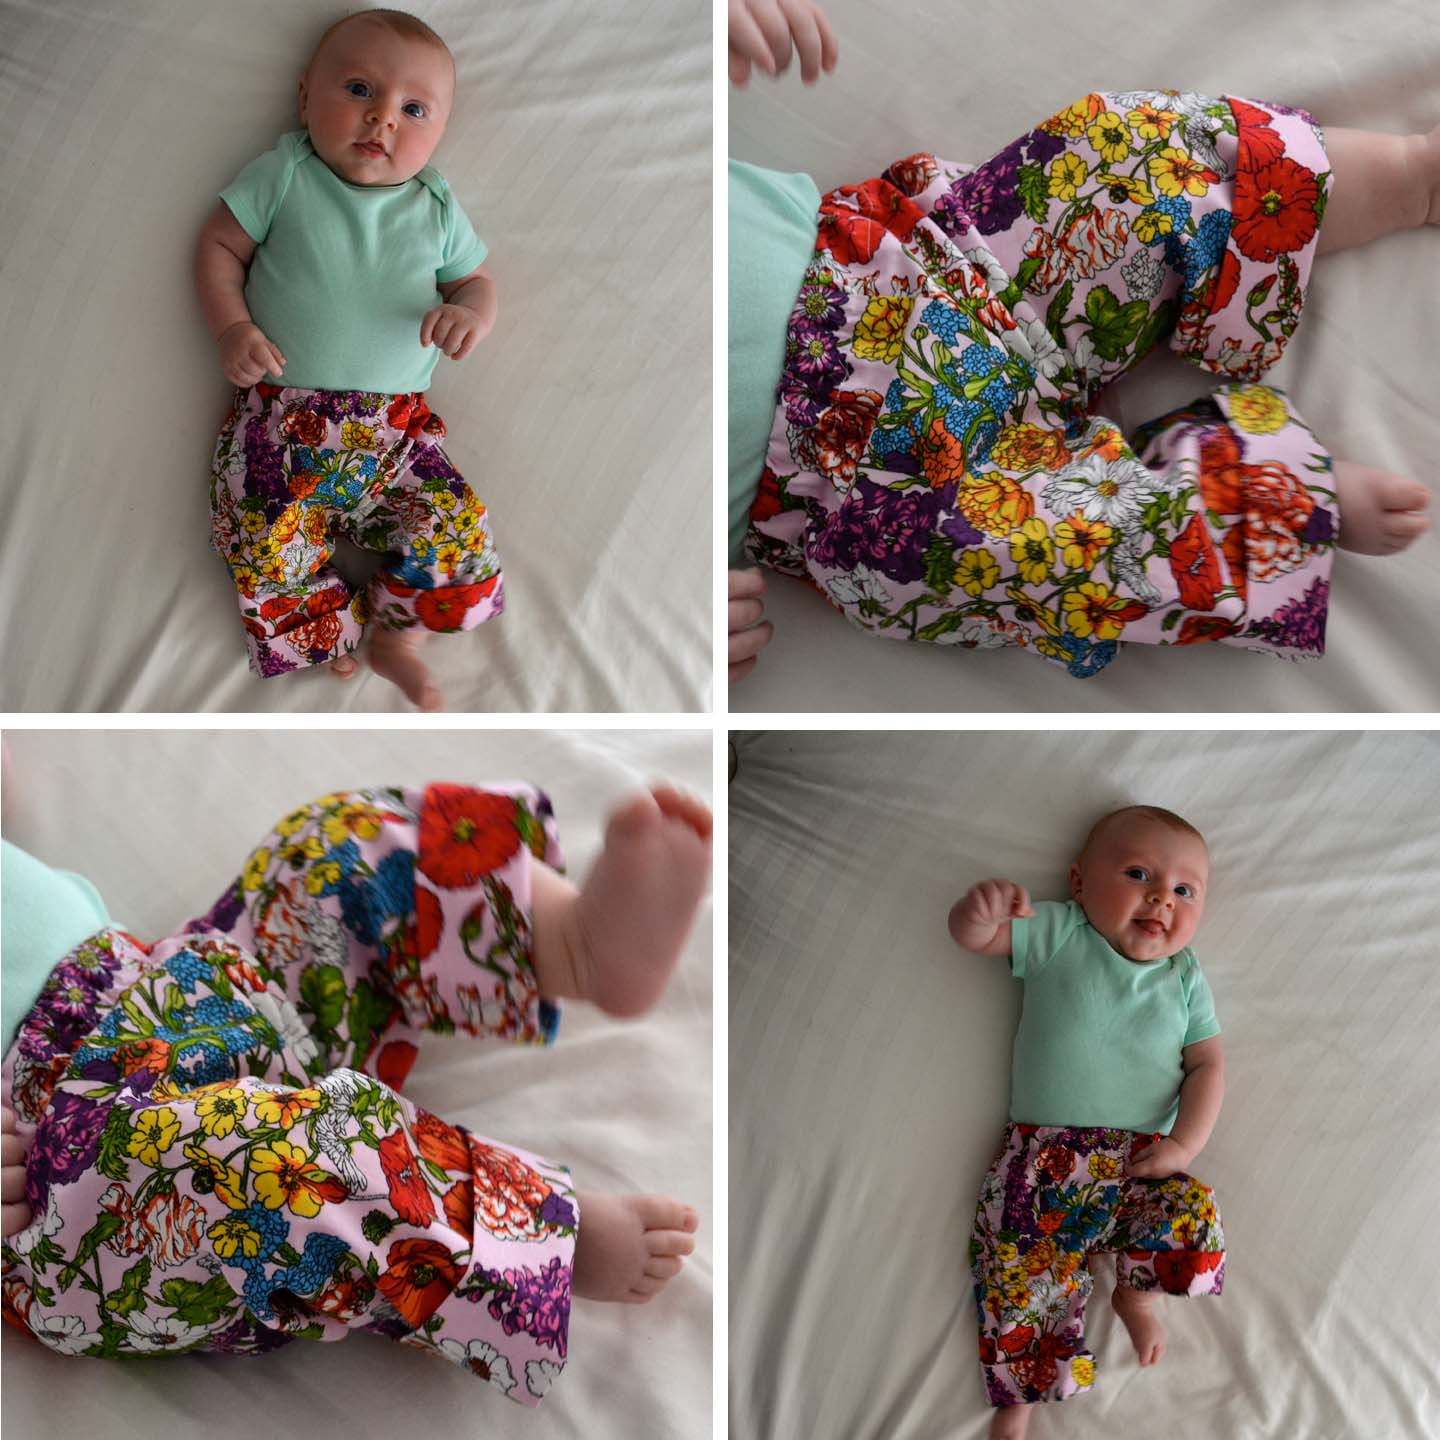
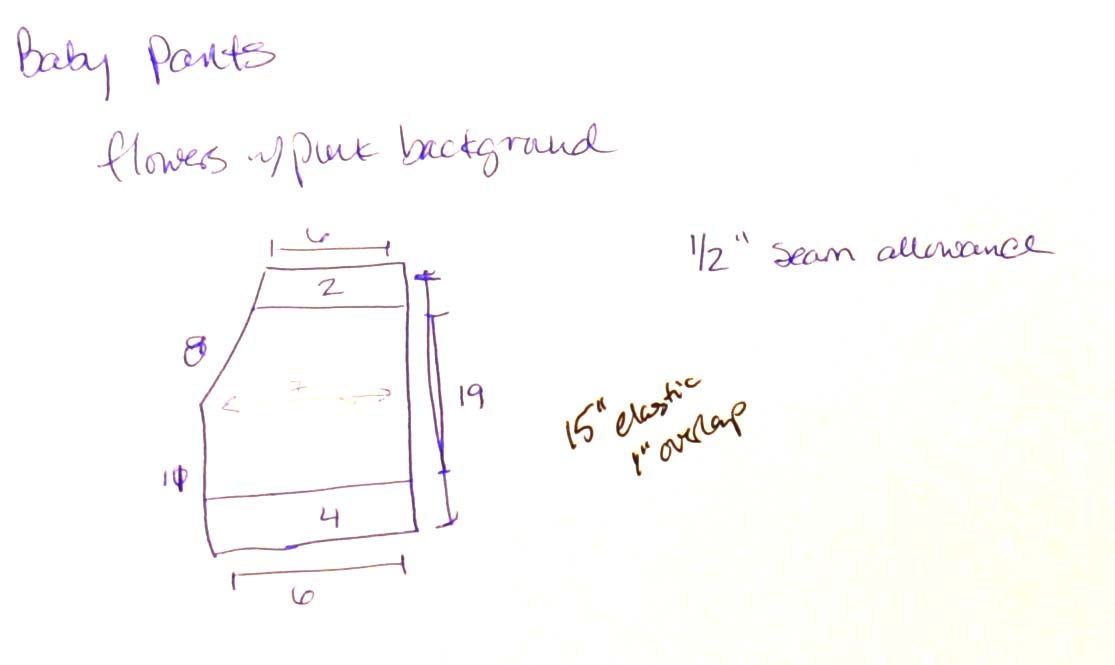
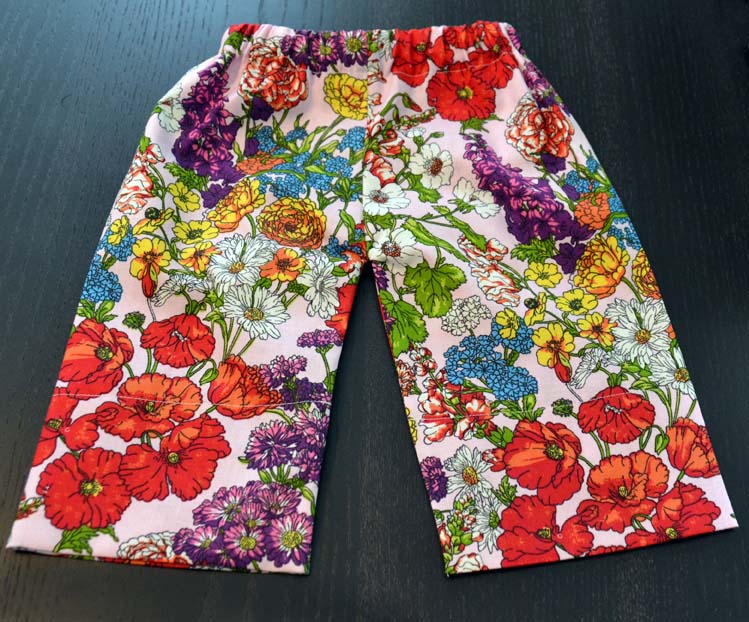
I usually start by drawing out my design, at least the shape and measurements of one pant leg. I’m super visual, and this really helps me, but it’s not necessary. I also draw out the design because it helps be keep track of all the different sizes of pants I’ve made. These pants fit Linde now, and she’s 3 months and about 14 lbs. I made them extra long, I think they’ll fit for at least 3 more months.
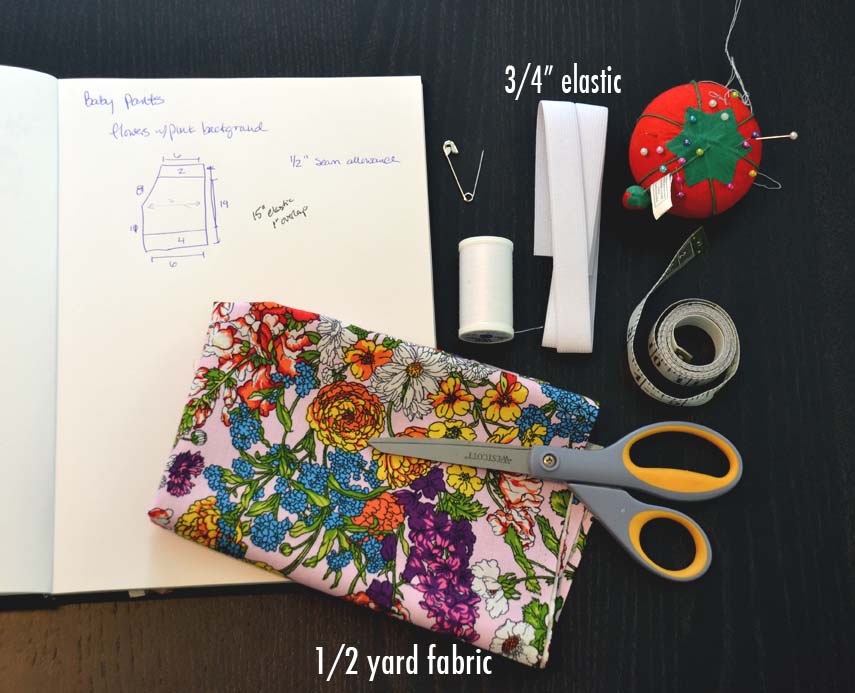
Gather your supplies. You’ll need the following:
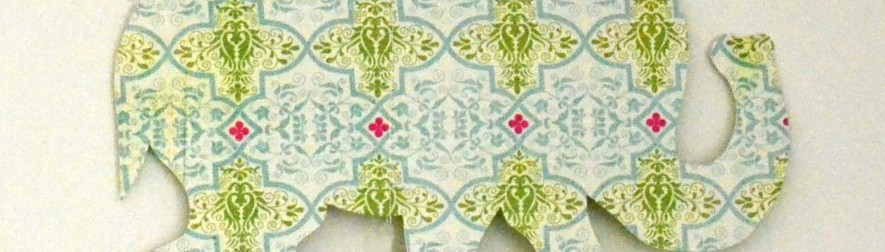
1/2 yd of fabric. I usually just use cotton quilters fabric. I think these have the coolest patterns.
15″ of 3/4″ wide elastic
thread
scissors
iron/ironing board
measuring tape
1 safety pin
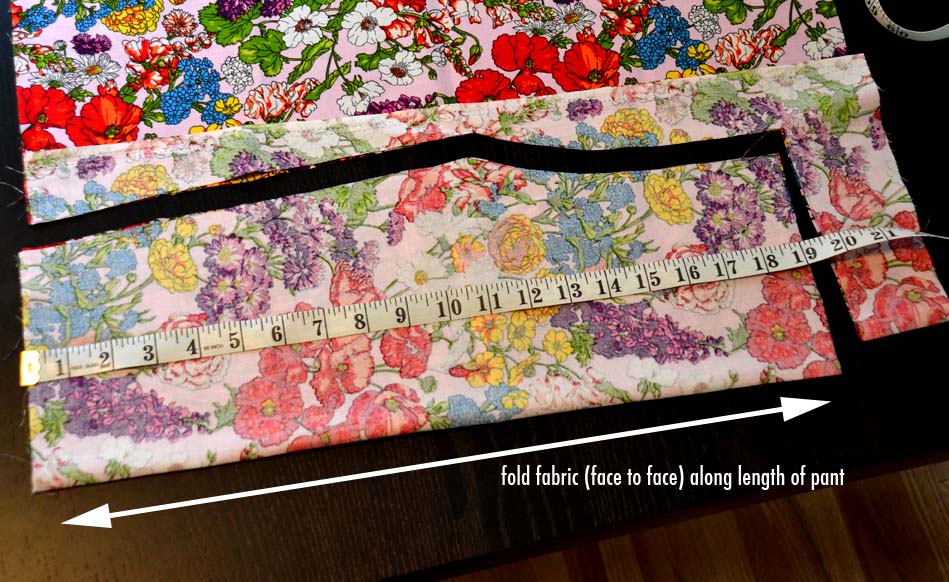
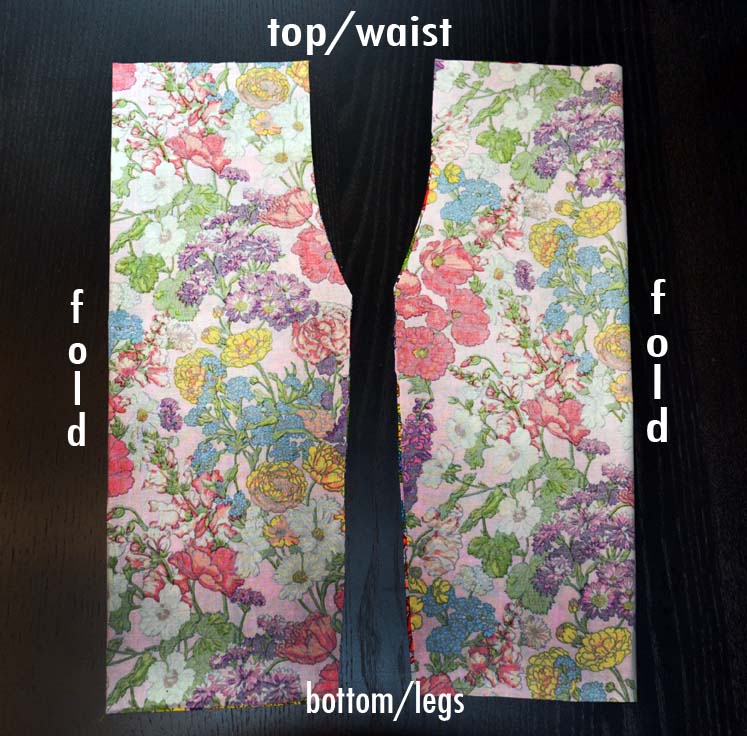
1. Lay out your fabric, and fold (face to face) along the right side. Fold far enough over to fit the width of the pant leg. In this case, that is 7”. Measuring everything out, I draw lines along where I want to cut, just like the sketch. Cut out the first pant leg. For the second leg, I just lay the first cut out over the fabric, and trace my second piece.
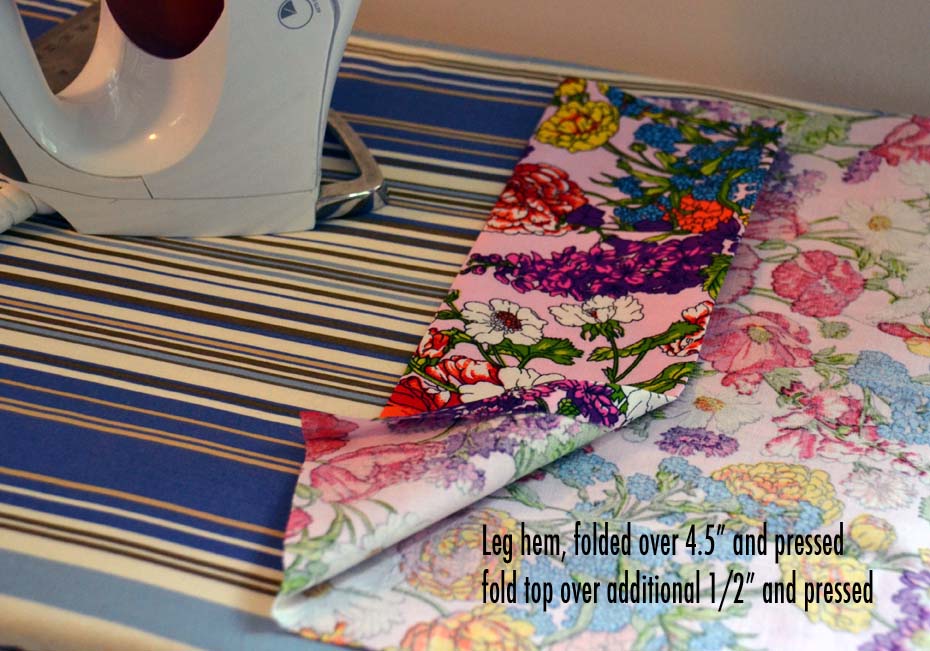
2. Sew the leg hems. Fold the leg end of the fabric up the length of the hem plus your seam allowance. In this case 4.5”. Pressing along the hem with an iron makes the sewing a lot easier, and that way you don’t need to worry about pinning. I also fold over the top, along where I will sew about 1/2” . This way you don’t have a rough edge at the top of your hem, and it looks a little prettier.

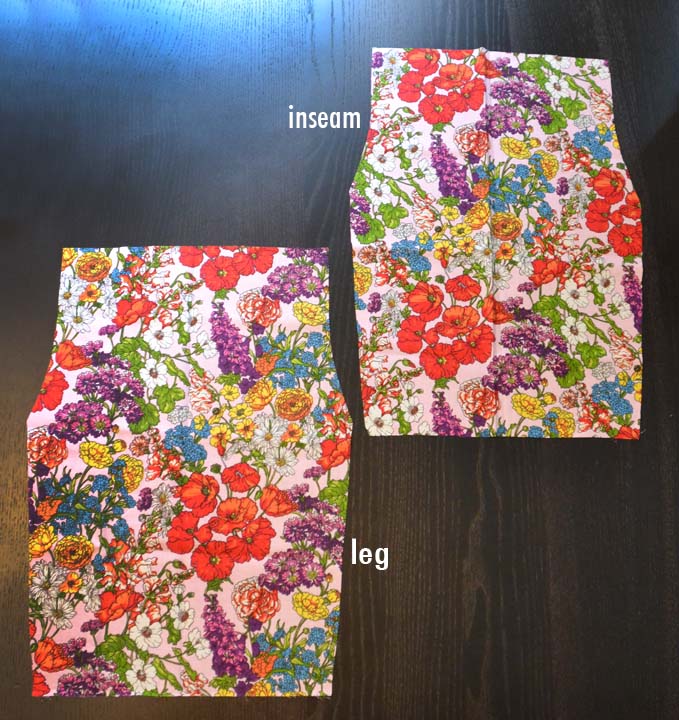
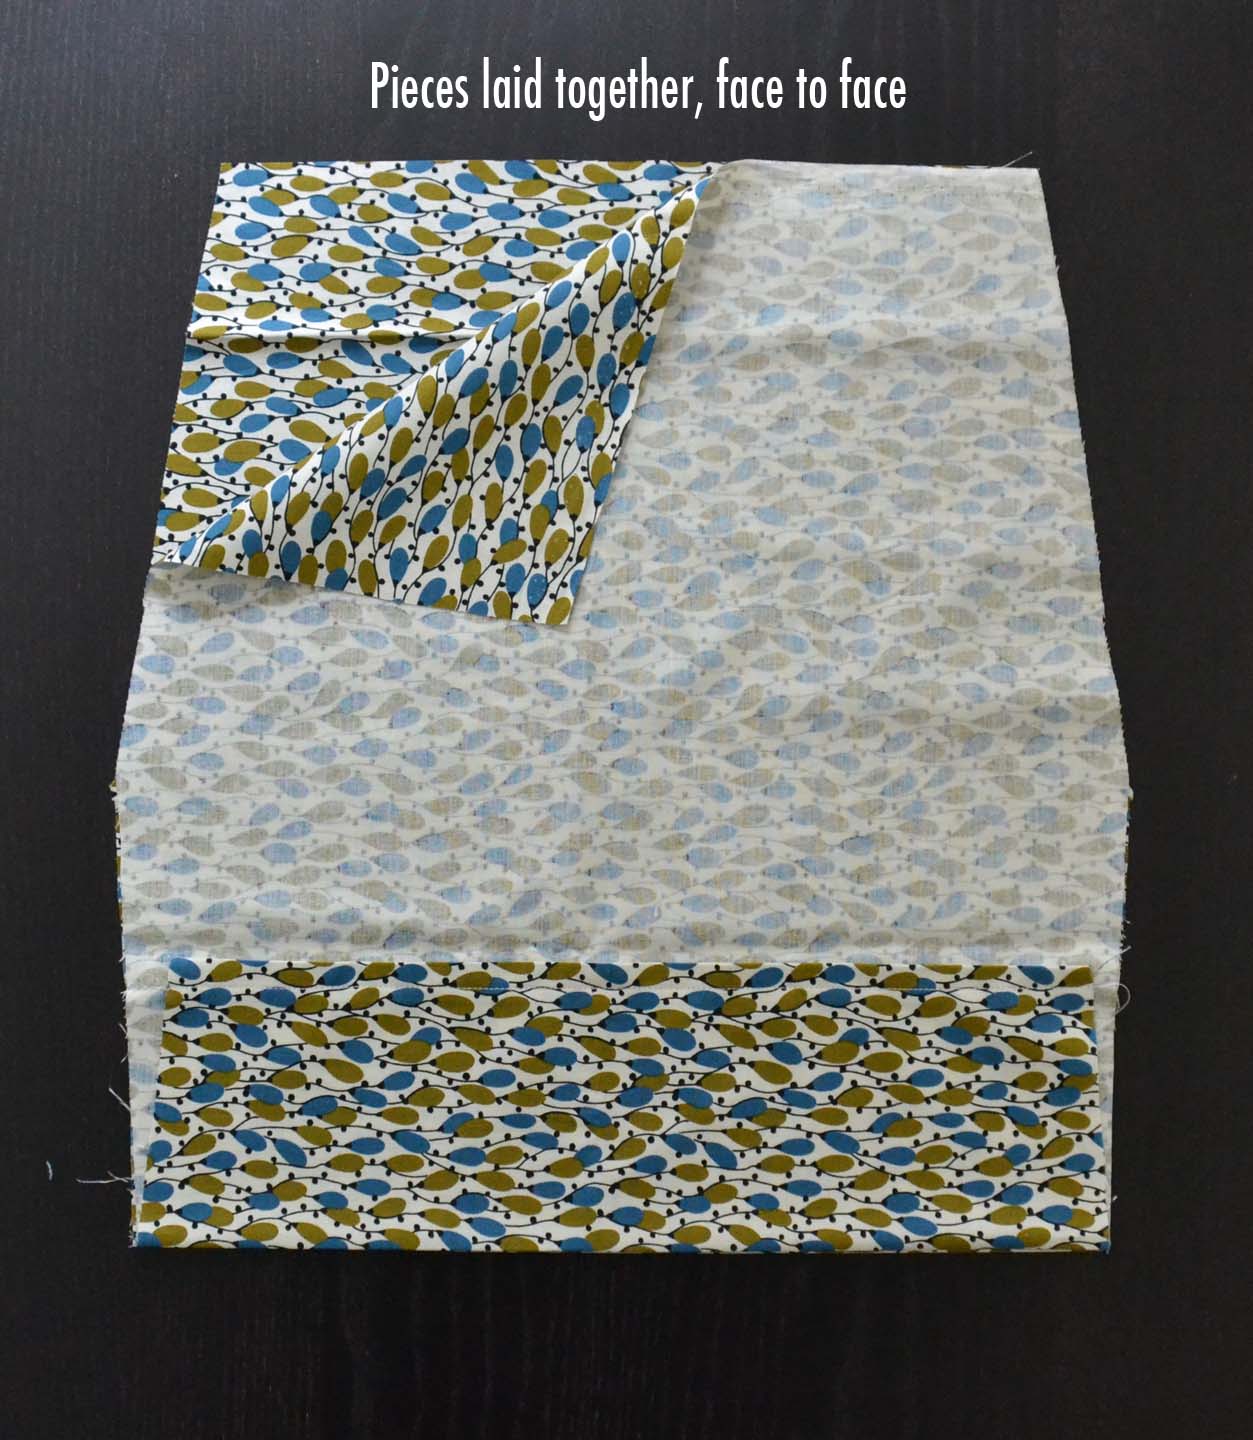
3. Lay the pant pieces face to face, and sew the pants together along the inseam. Stop before you get to the leg. Remember, you have a 1/2” seam allowance. The picture of this step is from another and larger pair of pants. I forgot to snap a photo of it the first time around.
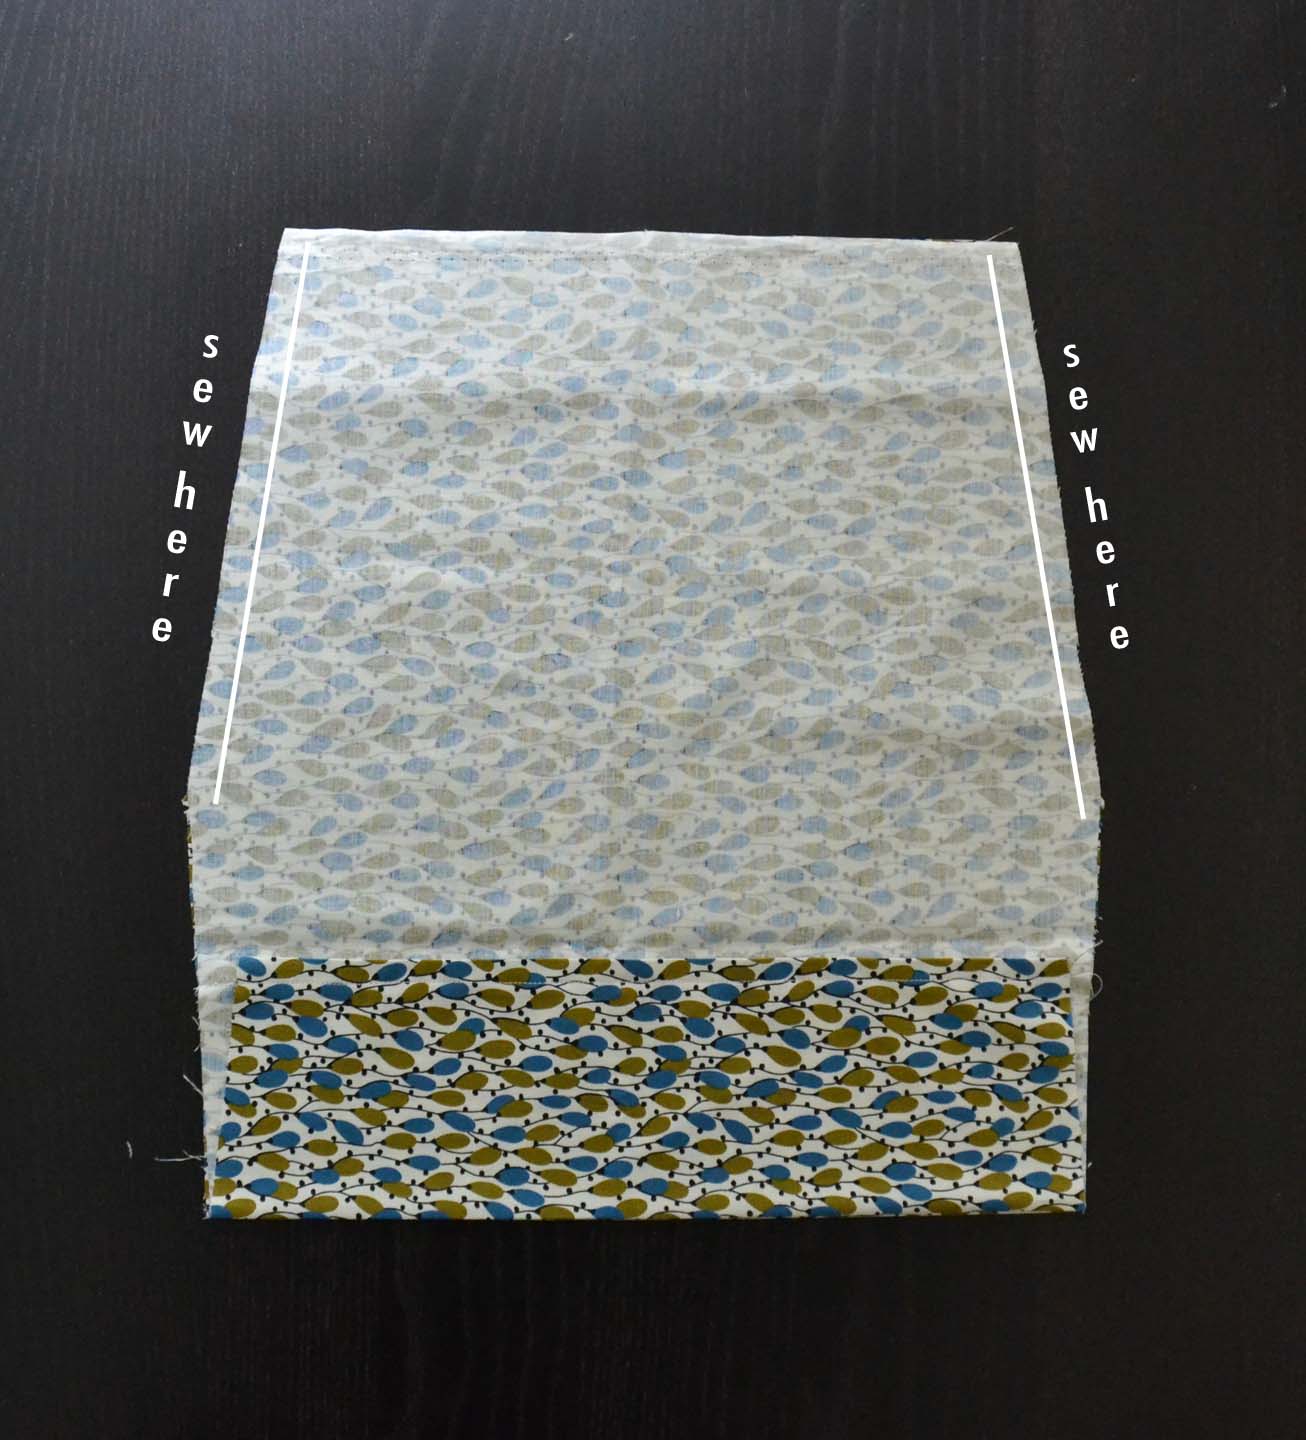
4. Now sew the leg seams. You are not continuing along the inseam, but matching up each leg to itself and sewing up the side of the leg. Make sure to match the bottom/hem of each leg precisely. To ensure they are aligned, it’s best to sew from the bottom of the leg, toward the crotch (yeah sorry, I couldn’t think of a better word). All four seams (from steps 3 & 4) will meet at the crotch.
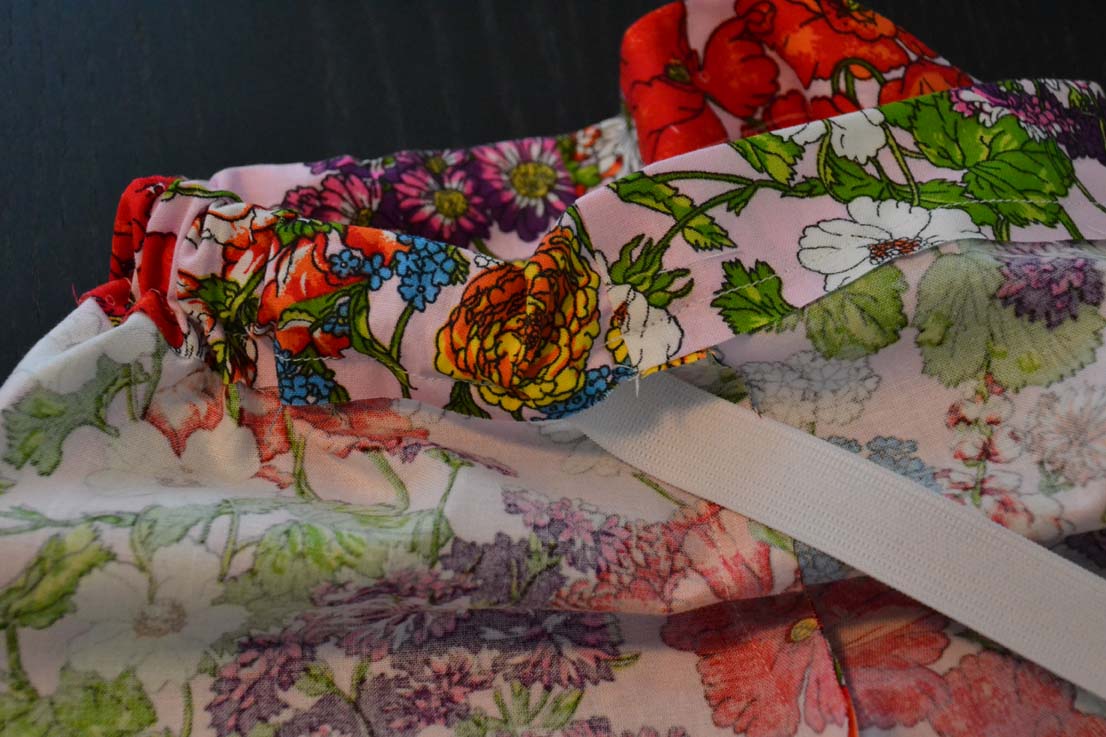
5. Sew the elastic pocket. While the pants are still inside-out, fold over the waist 1.5” and press. Sew around the waist, but stop about 1” before you reach the beginning of your stitch again. This leaves a space open to thread the elastic through.
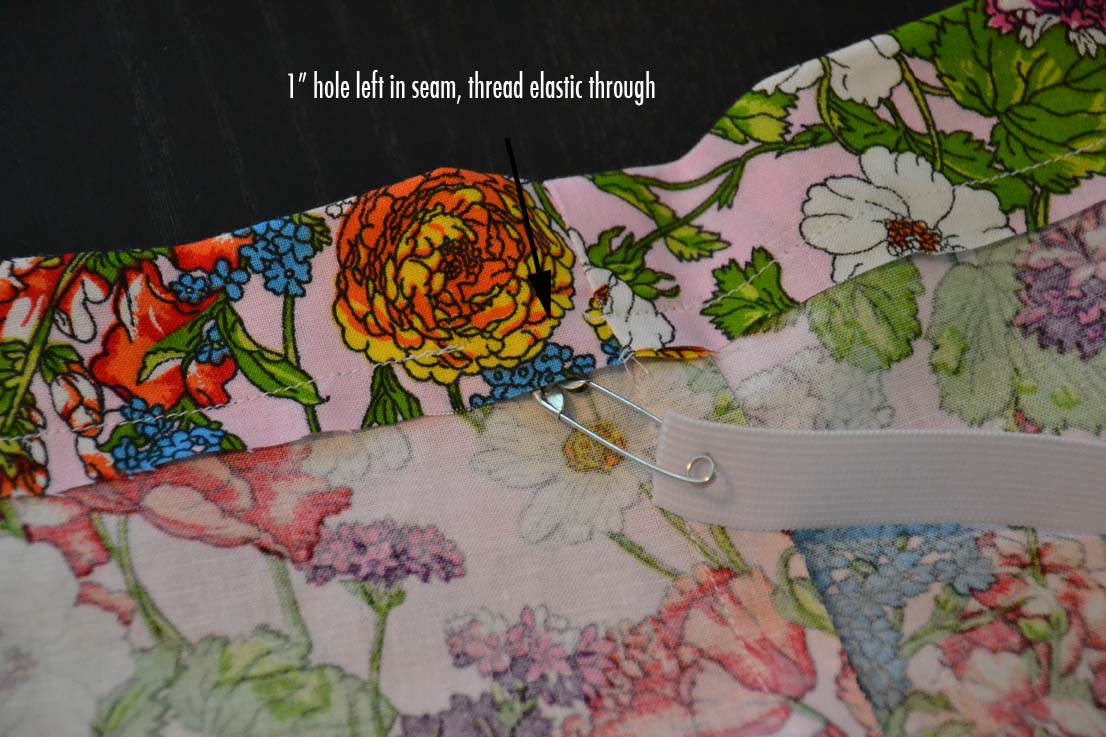
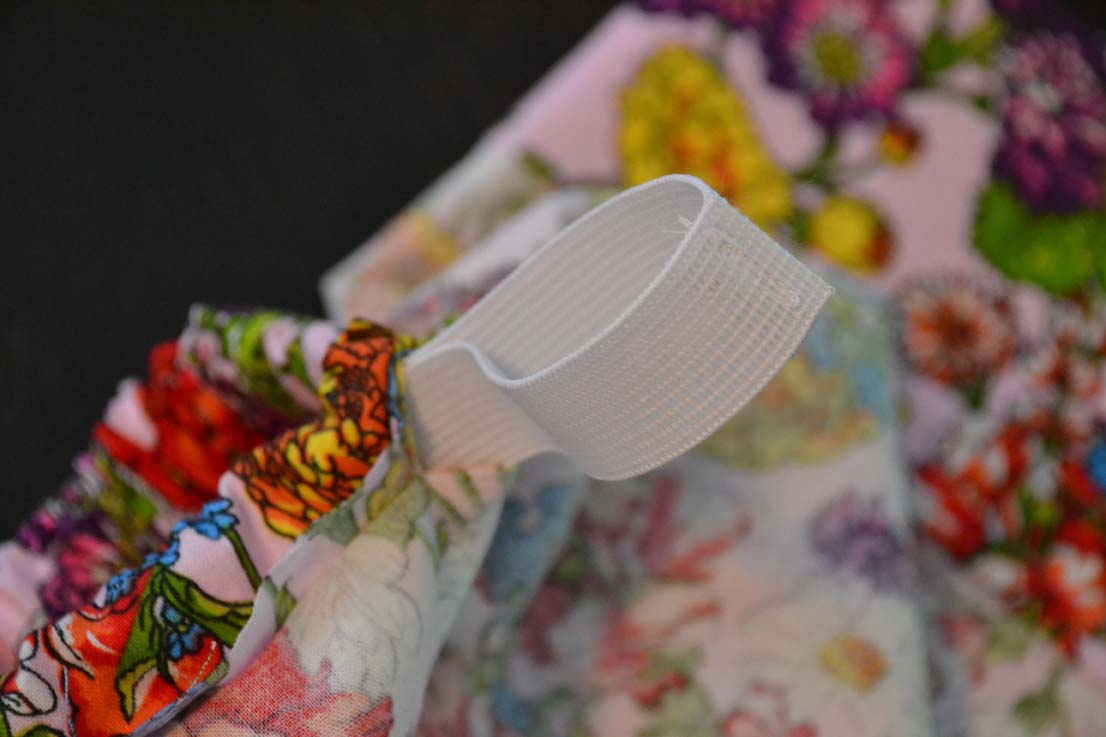
6. Thread the 15” long piece of elastic through the pocket. Attach a safety pin to the corner of one end of the elastic. While making sure the other end stays out, thread the safety pin end through the pocket around the waist and out the other side. Match the two ends of elastic together. Make sure the elastic has not twisted while being threaded through, you want it to lay flat. Sew the ends of the elastic together.
7. Close the hole in the waist pocket by completing your stitch.
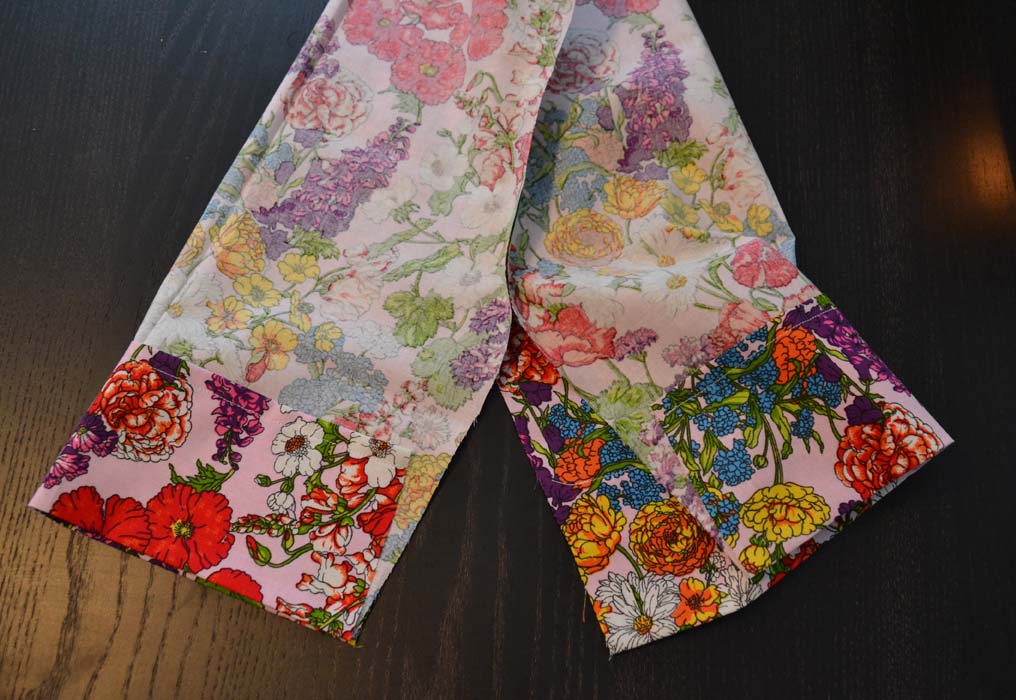
Turn those pants right-side-out, give ’em a press, and there you have it!
Were these instructions easy to follow? Any tips for making it easier?

OH MY GOODNESS, I LOVE THESE!!! 🙂 The super cute baby may help a little ;P
Thanks Ashleigh, I love the door mat art! I’m totally going to do that!
-Anna
Thank you!! And you definitely should, so so easy! 🙂
So sweet! I love the fabric you used.
Thanks Becky! The options really are endless!
I just wanted to say thank you for this tutorial. I purchased a pattern/tutorial and was getting very confused. I desperately searched Pinterest for an easy pants tutorial and found this one–even a beginning sew-er like me could follow your instructions! I really appreciate it. One question that stumped me–I got all the way to the point of threading the elastic into the elastic hem. I got stuck–literally–when I got to the part of the waist where the two parts were sewn together. The elastic obviously wouldn’t keep threading through the seam line. Where did i go wrong?
Hi Allie,
Thanks for using my tutorial! I’m trying to picture where you go stuck, and I’m not completely sure. Were you having trouble getting the elastic past the seams that go up the sides of the legs? If that’s the case, try pressing those seams flat, in the direction that you are threading the elastic. It can be tricky to work the safety pin past that extra fabric. I hope this helps. Let me know if I didn’t get your issue right. It’s hard to imagine without being able to see it!
Anna